Monday, December 12, 2016

Kouigns Amann


This is a lengthy, multi-tasked recipe. So, first I resurrected my requisite 8 metal rings from the storeroom, but I could not locate a sheet pan of the right size so I used only 6 rings on a smaller sheet pan. I attempted to find the highest fat butter recommended: Vermont Butter and Cheese Creamery Cultured 86%. My grocers did not have it, but I did find, and did use, Organic Valley European Style Cultured Butter 84%. This was a good thing. The King Arthur Bread Flour I had on hand as well as Dr. Oetker Instant Yeast and Caster Sugar.

Mis en Place


The instructions are clear  in the mixing of the dough and then it rests for 30 minutes covered.


My apartment kitchen is very small with one door opening and no windows. It is only ~4' x 8'.  When the lights and the oven are on, it is very hot. To keep the butter from melting during these folding turns was almost impossible, but I did the best I could to follow the turning and chilling, and as hot as it was when rolling and folding, frankly I was pleased that it came out as well as it did.


Thursday, December 8, 2016

Luxury Chocolate Buttercrunch Toffee


 I took advantage of the experience of our other Alpha Bakers' posts to approach this endeavor. Marie was mystified by the wide range scale of amount of chocolate called for in the recipe and finally decided upon half the amount which was 225g. [divided 112/113g].  From the looks of her results, that sounded good to me! She used brown sugar, but I happened to have some Light Muscovado so that worked out well. The other required ingredients presented no problem. I bought some blanched almonds, and proceeded onward with Vicki's "Happy Stirring" notes ringing in my ears.


I mixed the Light Muscovado Sugar in the pan with the requisite corn syrup, butter and water with a wooden spoon.


I love using my father's old wooden mallet ;  )
Weighed out, chopped, and divided the chocolate to be sprinkled to melt on top and bottom of the hot toffee.


I used blanched almonds and toasted them first. After cooling they were divided into two bowls for tops and bottoms of the candy.

Once this mis en place was complete, putting the toffee together was also simple.

The Silpat had been readied for the hot toffee and it was poured on and smoothed out:


           However, I began at 6: pm and it is now 1: a.m.  Long stirring and constant temp checking was more tiring because I had started so late. Actually, I used Rose's caramel pot and think I would have been smarter to use a larger pot and to have doubled the recipe since I want to give it for little gifts. 
            But all is well that ends well, and the toffee has now been delivered to three happy people!


Tuesday, December 6, 2016

White Chocolate Cupcakes with Raspberry Mousseline

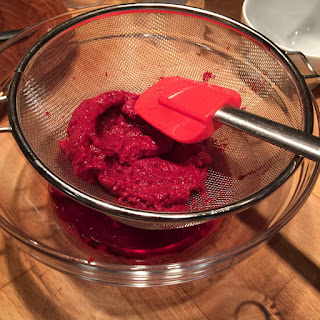
After pining for the food mill that went with the ancient disc I had found here in the junk drawer, I realized I was not going to have the luxury of dealing with the raspberries and their seeds other than with the dreaded strainer. So, I went and procured the necessary 12 oz. bag of frozen sugarless raspberries, no sugar added, thawed it in the oven with pilot light [brilliant Rose idea!], and proceeded to manage 3 oz. of pulp and made into its syrup.


I recalled that I had two Lekue muffin pans of 6 cavities each such as Rose mentions below:
Then I needed to recall whether we used liners, spray or what for the muffins. So I went to Rose's Heavenly Bakers on p. 534 and was told by Herself that, "Silicone pans without liners give just the right support to produce cupcakes or muffins with the nicest domed shaped." She continues, "My favorite silicone pans have six cavities. Each cavity is the same capacity as that of the cups in a standard muffin pan: 1/2 cup/118 ml. As with other silicone pans, it is a good idea to set silicone muffin pans on wire racks and then set the racks on sheet pans or cookie sheets for support so that air can circulate around them and ensure that they bake evenly..." She adds that a 2-inch diameter ice-cream scoop is great for dispensing cupcake or muffin batter quickly and neatly into the cup."  Now, however, I arrive at the recipe at hand and am told that I need "16 cupcake liners set in muffin pans or custard cups." Well. Now I don't know what I need, and it is almost midnight. I re-read the paragraphs. I wrote Vicki. I decided:  Since I am using the silicone, I shall lightly spray the silicone cavities with Baker's Joy and wipe it out. So. I am going to bed.


In the morning everything seems fine. I do the mis en place for cupcakes:

My vision is not good and it is a lot easier for me to bake from the iPad that now suddenly needs charging, and so I am - really tempting fate, using iPhone -- I am mixing the ingredients in the mixer and I make the old, old mistake: When I add the egg mixture I do Not do it in two parts and, therefore, I do not beat on medium speed for 30 seconds after each addition to incorporate and strengthen the structure. I knew immediately: Oh No!! I gasped.  But I thought maybe it would be okay. So I finished the batter and continued with my ice-cream scoop, filling cavities. I had just enough batter. Not enough for four more. So we sat and did our 20 minute rest at room temp.


Resting for 20 minutes before baking


Resting may have resulted in rounded tops, but they weren't up and fluffy; they, as you can see, were down in the cup. It wasn't okay.


The cupcakes were not cake. They were/are short and doughy. Crumbly and sort of biscuit-like. I am not motivated to do anything with them even if possible. I had intended to take them to a meeting today all dressed up fluffy in pink mousseline, but instead am just chalking it up to experience.

Saturday, December 3, 2016

Pomegranate Winter Chiffon Pie

 As I made a plan for this pie, I had decided to use my smaller  Rose's pie plate. But ultimately I decided to use the recipe's suggested 9 1/2" deep dish and was lucky enough to find a beautiful and inexpensive Pyrex one.   

    In August, Rose gave us some new information on her blog about how to prep the pie plate for the meringue shell, as opposed to the initial recipe information found in The Baking Bible. 
   Her latest results were that: "coating the pie plate with non-stick cooking spray and then dusting it with cornstarch ... worked the charm." She had tested more by coating the plate with non-stick spray, wiping it off with paper towel, and dusted with corn starch. Instead of piping the meringue, she just spread an even layer onto the plate with spatula. Without the cornstarch she found it was more difficult to spread the meringue, and at times the meringue was still gooey in places and needed more times back in oven because it will not cut unless totally dry. 
     Nevertheless, her conclusions were: "Piping makes it easier for consistency in thickness, but spreading looks as good. 
   "The non-stick cooking spray plus cornstarch is ideal and makes it possible to unmold the meringue shell. Non-stick spray alone is slippery, which makes it harder to spread the meringue and will not be possible to unmold in one piece." Finally:
    "With or without cornstarch, non-stick cooking spray makes removing the slices much easier than shortening and flour."
 (Rose posted the above on 8/13/16 in blog Real Baking with Rose)

11/29/16
                  Mis en Place for the Crisp Meringue Pie Shell
 I am very poor at piping. I have taken classes, but not enough. I wanted to pipe the meringue and it started out okay in the center of the plate spiral, but soon it was off-center and I was trying to fill in. The temperature was warm in the kitchen and it began to melt. I was panicked because I was running out of meringue. 
    So, after baking, I just did the best I could with what I had by glazing with white chocolate, but it wasn't good enough I found out later as still more major cracks showed up in the morning. 
Using non-stick spray and cornstarch to prep plate
I had made the white chocolate glaze and applied it where I saw large cracks. Then today after it rested all night (what was left of the night, that is), there were still more cracks in the body and around the top. I had already spent about 7 hours and I was bone tired, and it has been raining for three days. I doubt if that mattered however. So I just moved forward and did not glaze with more white chocolate today. What you see here below in the baked shell is from yesterday and there are many more deep cracks. I am just going to serve it in coupe style. They can chomp away at chunks of delectable white-chocolate meringue, Oh my!


So, I then went on with the filling, which was easy and delicious:


Pomegranate base ready for cream addition
There is a residue of cornstarch and white chocolate glaze on the bottom that is not very pleasant. At this picture the pie had only been in fridge an hour and the filling was not totally congealed, although it tasted delicious.

Sunday, November 27, 2016

Chocolate Sweetheart Madeleines


Obviously, the above are not Chocolate Sweetheart Madeleines -- While trying to get my present blog's photos to come up, I came across the above muffins that composed the utterly fantastic, my favorite, "The Bostoni" from Rose's Heavenly Cakes - I had extra batter, hence the madeleines, and they were just exquisite. Still, now at present I cannot post the few photos I need to use today.

***I will try a little longer before I just leave out these several pertinent pictures and try to complete the exercise of posting now. I am going to have to go to Mac at the mall for help today since I have had problems with the internet also. 

     The Chocolate Madeleines: The mis en place for these chocolate madeleines was simple, but still I was concerned about piping the right amount of the batter into the large-sized silicone mold cavities. I found, however, that filling it about halfway, as instructed, allowed it to rise beautifully even if it wasn't put in well. I really had just about the right amount, thus the worries were put to rest, and next time will be easier. Due to Rose's caution, I was careful to beforehand brush any extra spray from the cavity, and although the cake appeared granular, the ganache managed to cover it, and gave it lovely moisture and sheen. 
    All in all I found the cake to be wonderful and airy, with a slight back-flavor of caramel that a friend also noted. I thought perhaps the sour cream lent that taste somehow. At any rate, I think these are wonderful petite cakes for any tea or dessert tray.